
Software guide
Getting started with NEMABREAK
Slice a break, arrange clips, add operations, and capture the result. Learn the Source, Build, and Render workflow in the app and DAW instrument.
NEMABREAK turns recorded audio into new loops. Import a break into Source, arrange its slices in Build, and hear the processed mix in Render. Capture that mix back to Source when you want to cut it up again. The standalone app and DAW instrument use the same workspace.
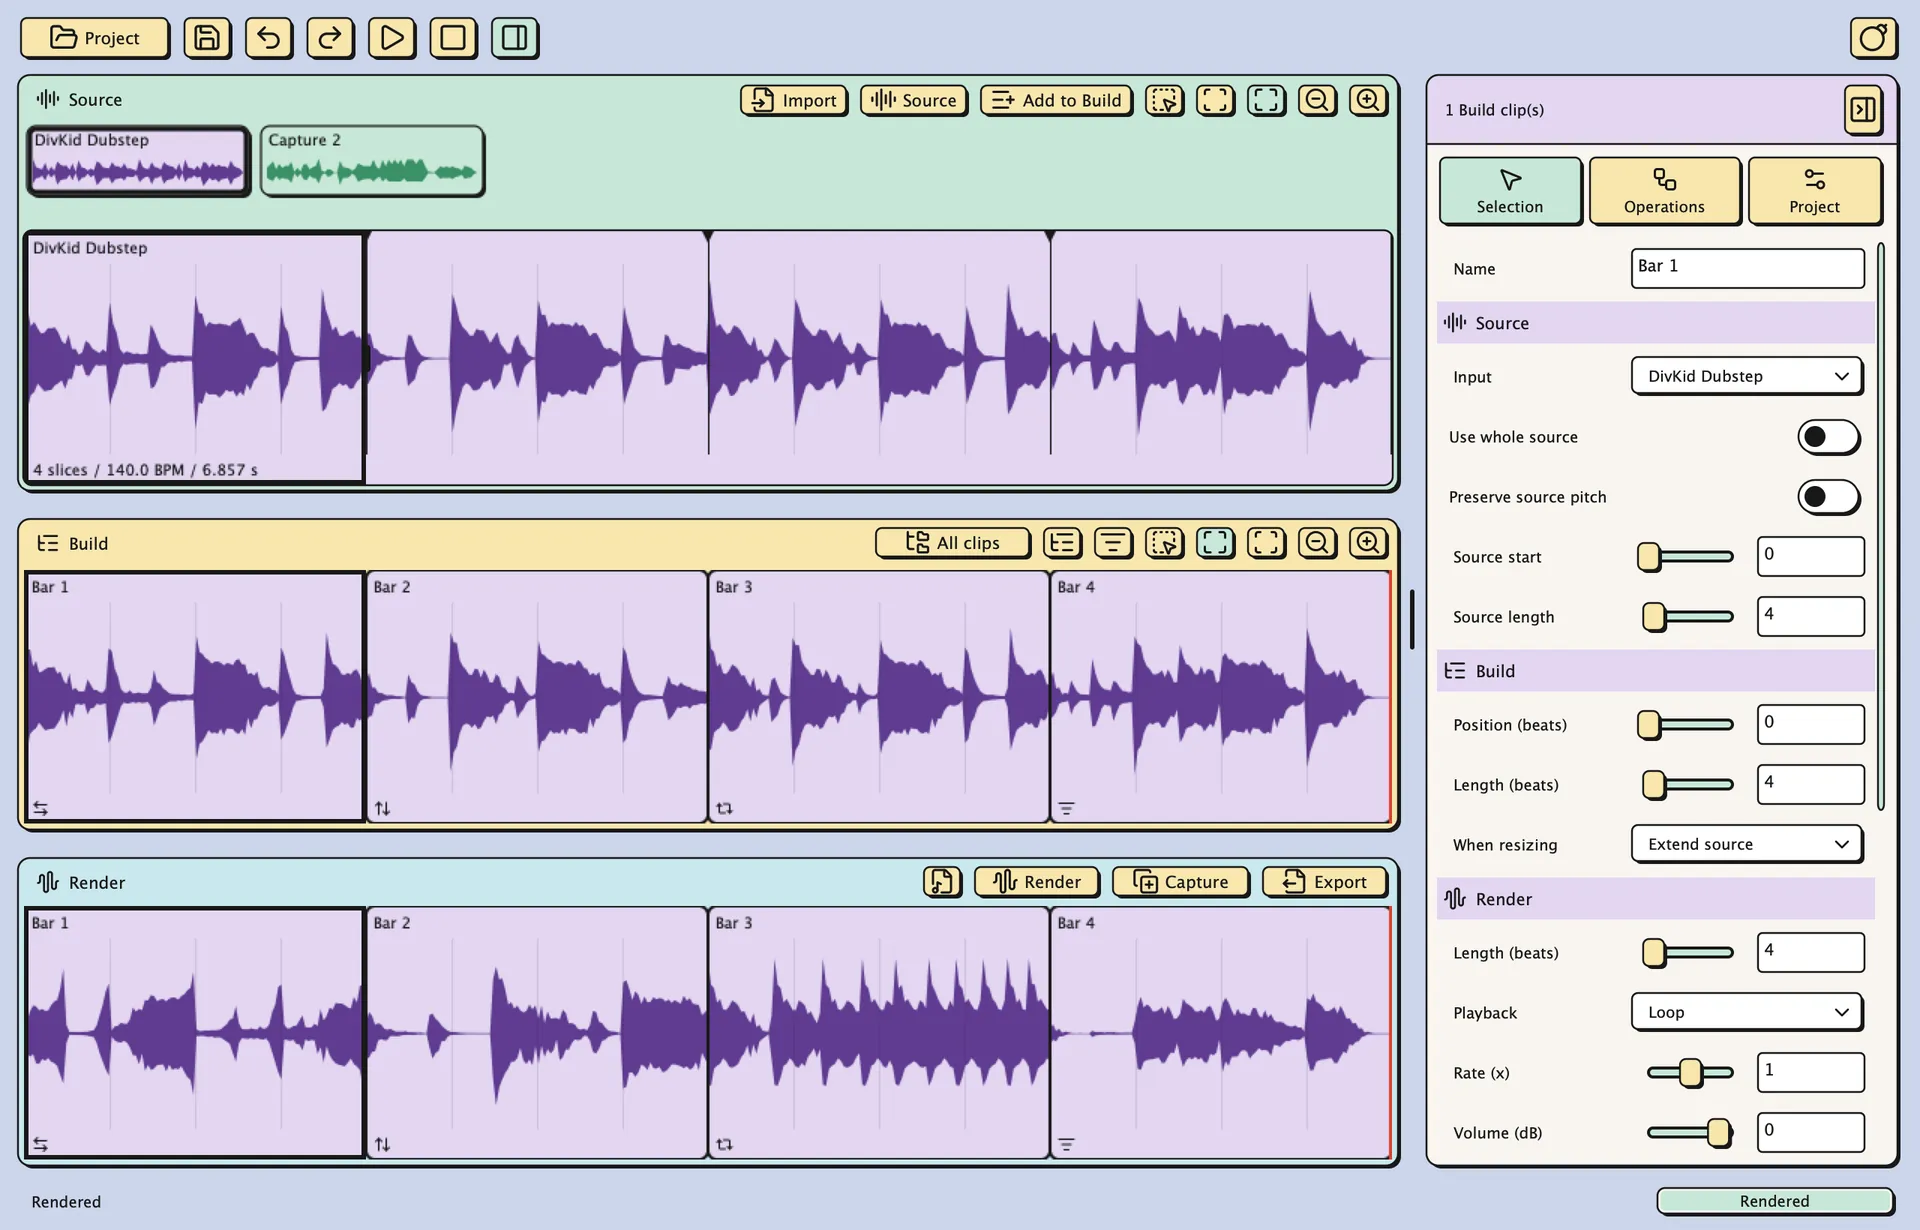
Make your first loop
- Get the app or instrument from NEMABREAK Downloads. Choose the package for your system. For this first pass, open the standalone app.
- Click Import or drop a drum loop onto the window. Click its card on the source shelf to see its waveform.
- Open Source properties and check the detected tempo. In Project, set the tempo you want to work at and check Fixed output length.
- Click a slice, or Shift-click to select a span of slices. Click Add to Build to append them to the arrangement.
- Select a Build clip, open Operations in the inspector, and click Add operation. Try Reverse with Chance at 100% so you can hear what it does.
- Press Play. Edits render automatically after you release a control. Rearrange a few clips and listen again.
- Click Capture to put the saved result on the source shelf, or use Export WAV to save an audio file.
You can do this without registering. The trial allows three sources on the shelf, including captures, with playback, operations, saving, and export available. It shows a dismissible registration reminder every five minutes.
Slice and select source audio
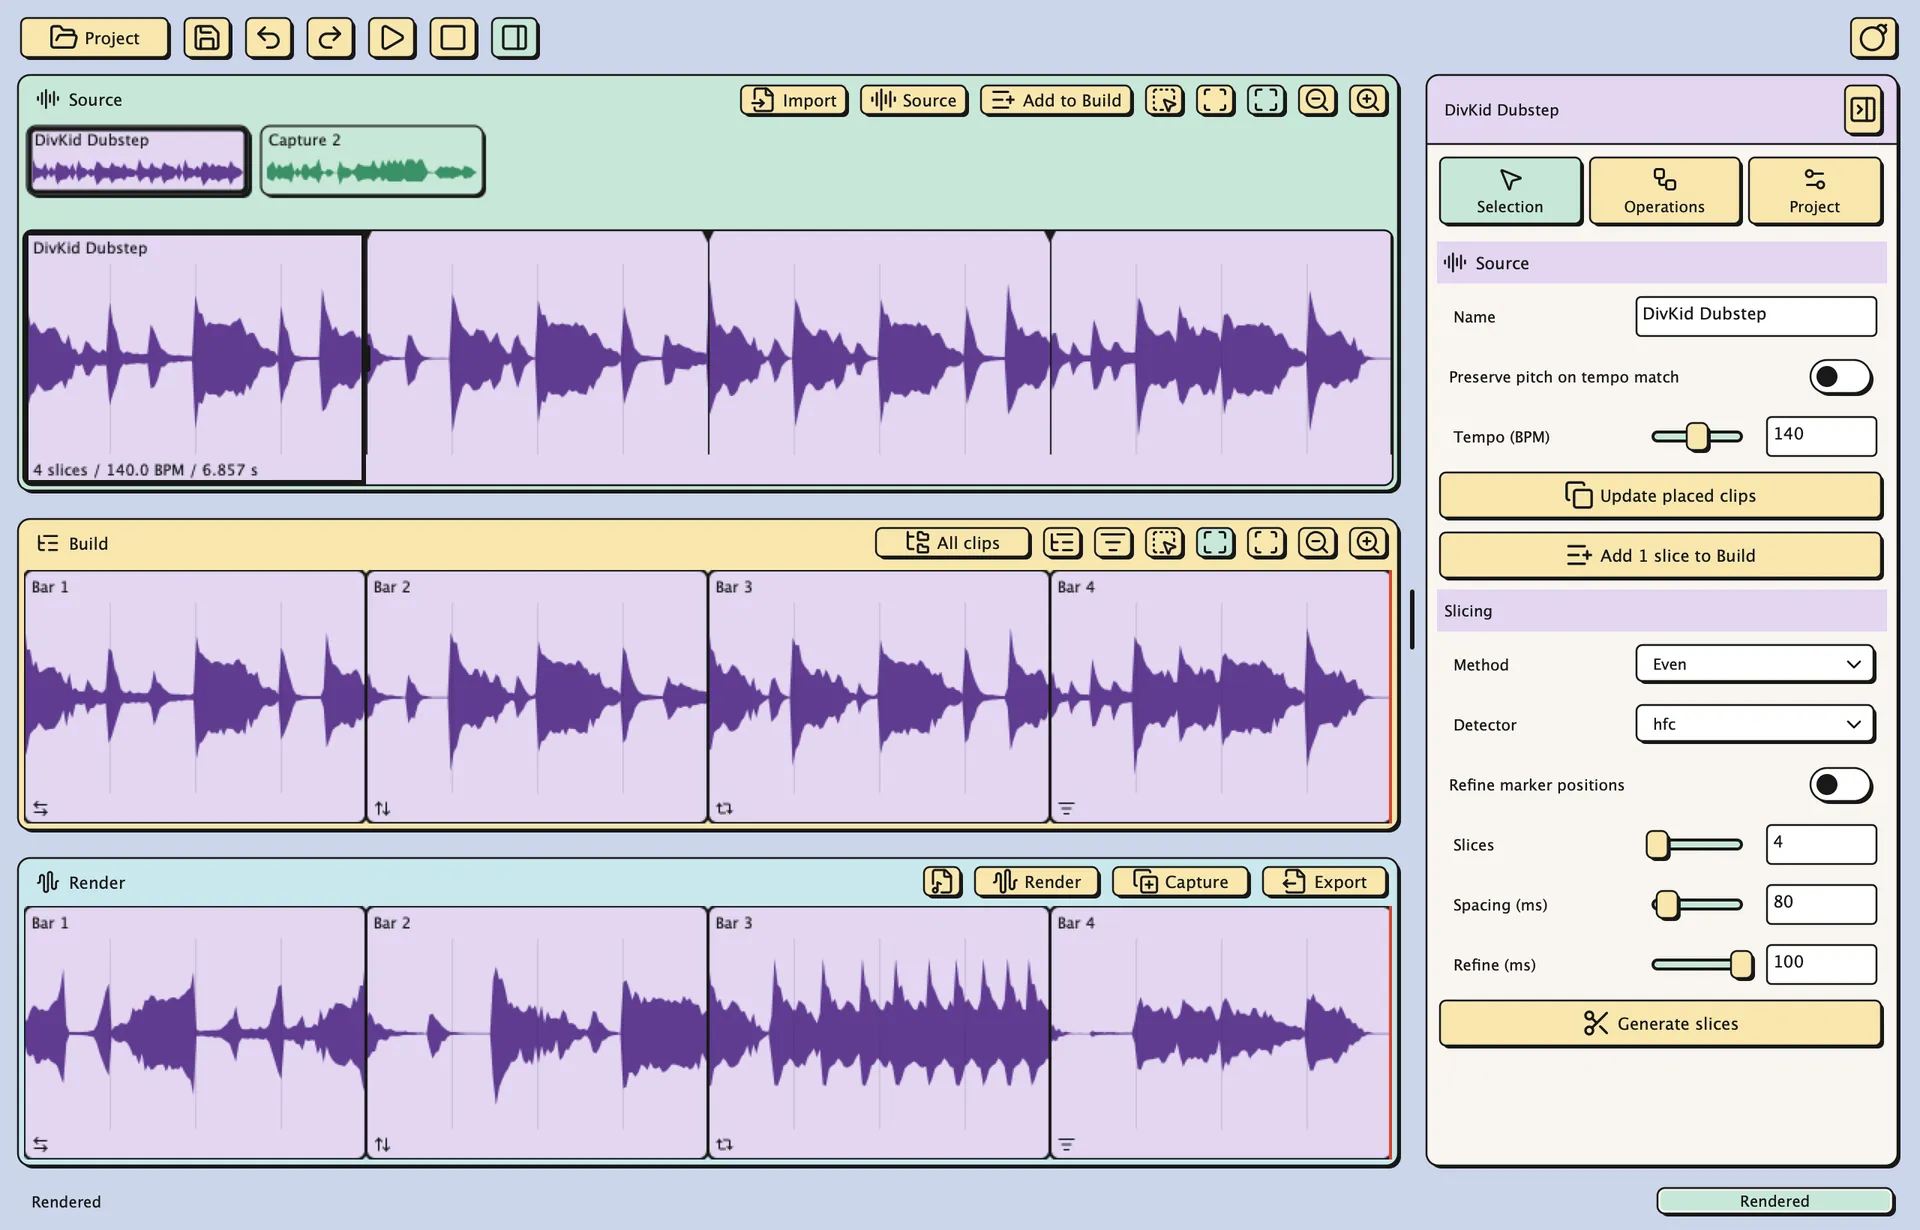
Each imported file gets a shelf card. Source properties holds its tempo and pitch preservation setting. Pitch preservation starts off; enable it when you want to match the project tempo while keeping the original pitch. If you change these settings after arranging, Update placed clips copies them to the clips already using that source.
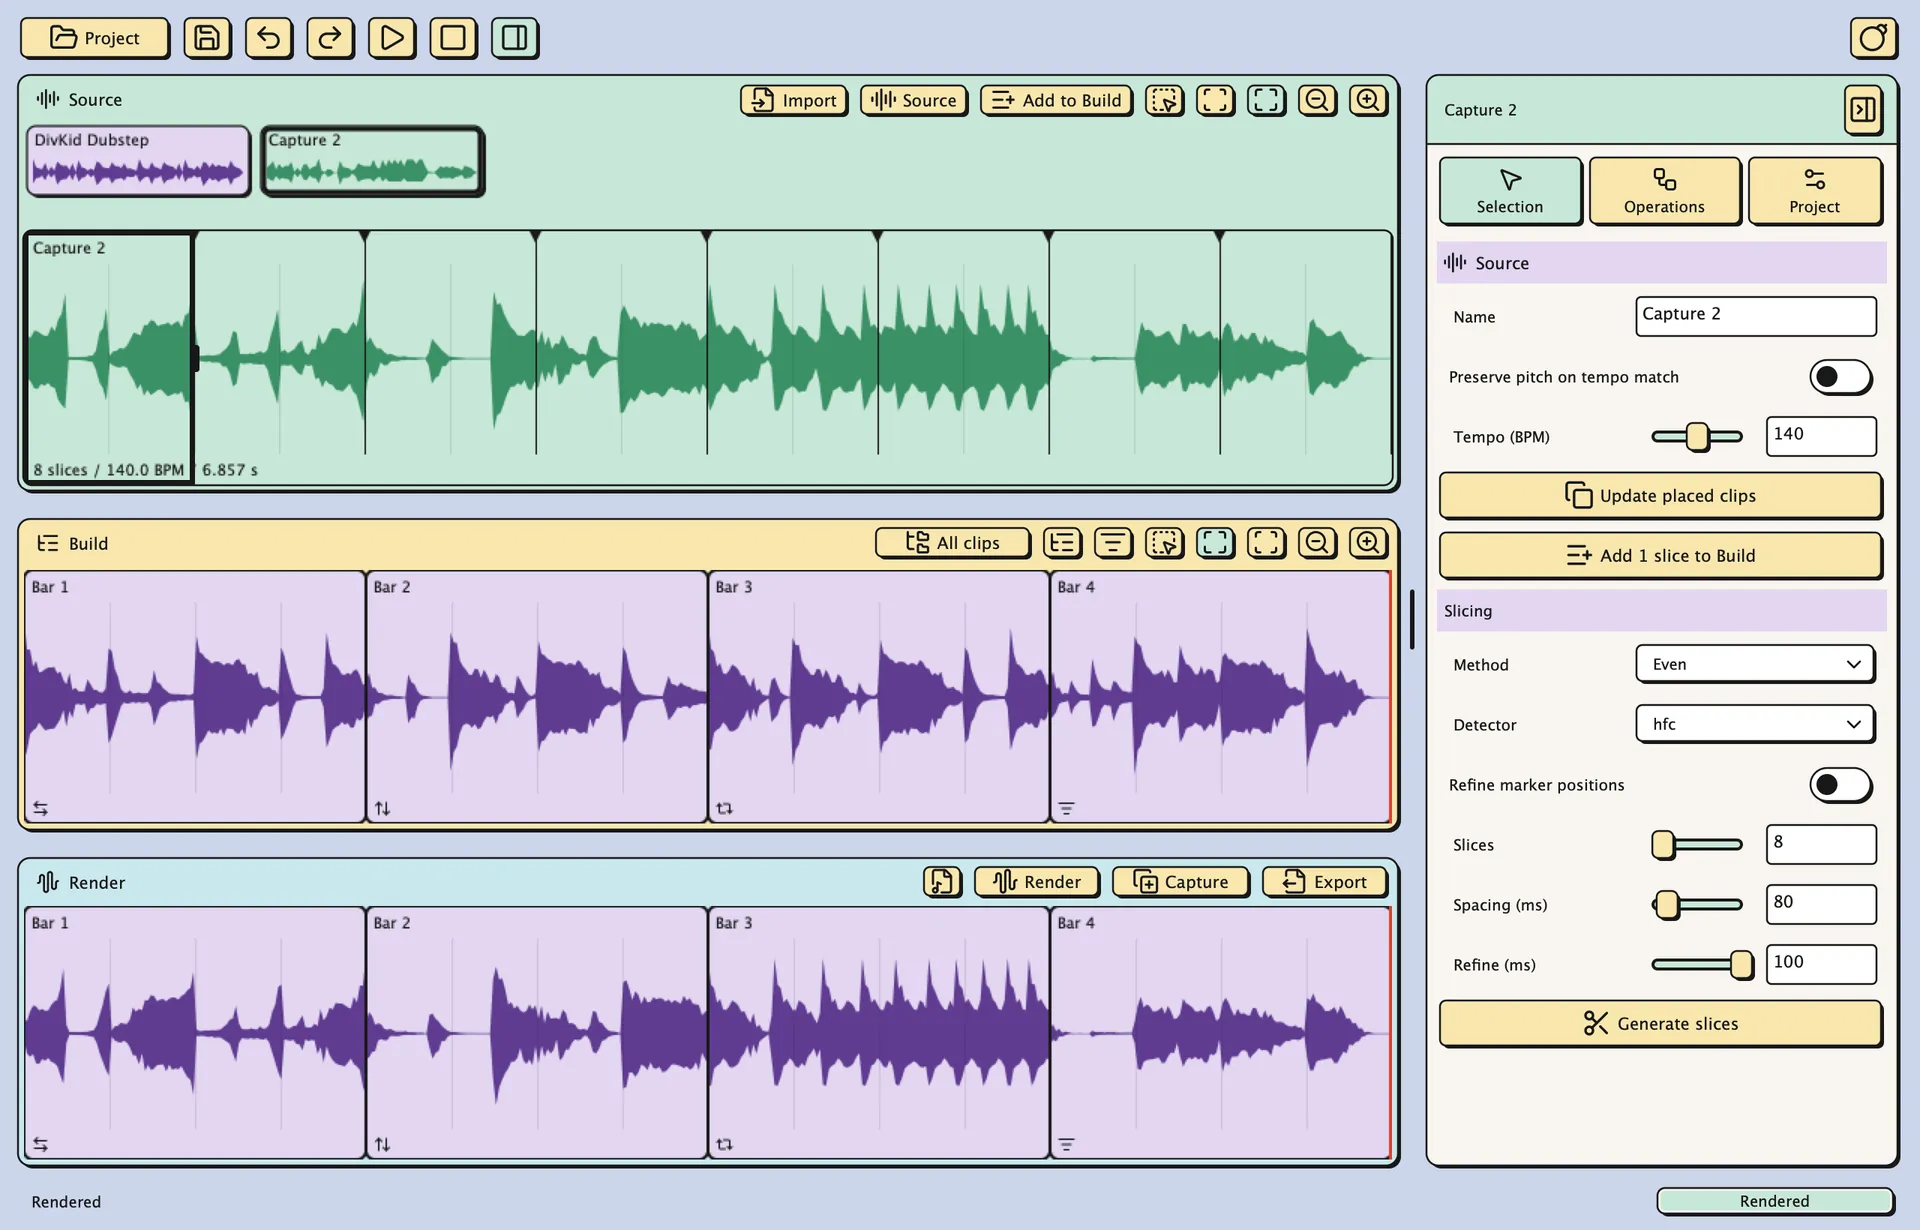
New sources have evenly spaced slices. In the Selection inspector, choose Even for equal pieces or Automatic to find sound onsets. Set the requested count, adjust the detector and minimum spacing if needed, then click Generate slices. Generating replaces the current markers. Refinement searches near existing markers for a better boundary.
Click a slice to select it, Shift-click for a span, or Command/Ctrl-click to toggle individual slices. Double-click a slice to listen. Drag marker triangles to move boundaries; right-click inside the sliced region to add a marker, or on an internal marker to remove it. The edges of a selected slice can also be dragged in the waveform.
For a range that ignores the slice markers, drag across the waveform's top name strip. Drag your slices or range into Build, or click Add to Build. New Source from Slices, when available in Selection, joins selected slices in source order into a new shelf source. Fit source selection zooms in; Full source shows the whole file.
Arrange and resize Build clips
Drag a clip's body to move it. Drag its right edge to resize it, or its left edge to trim or reveal the beginning while keeping the right edge fixed. Positions snap to the project grid. Release to commit an edit, or press Escape to cancel the drag.
The resize setting determines what fills the Build slot:
- Extend source reads more or less of the source, wrapping through the file as needed.
- Stretch to fit fits the material to the slot while preserving pitch.
- Add space plays the available material once and leaves the rest of the slot silent.
In Selection → Source, change Source start and Source duration to choose different audio inside the same Build slot. Use whole source allows reading beyond the selected source region. Input replaces the source or loads another file; Unassigned leaves the clip silent.
Shift-click selects a span of clips; Command/Ctrl-click toggles individual clips. Drag empty Build space for a marquee. Selected clips move together. Select all like adds clips using the same sources. Click empty space to clear selections and ranges.
The Build and clip context menus include Copy, Paste, Delete, and Split at grid midpoint. Swap reverses the selected clip order; Shuffle chooses another order. Both preserve clip durations and the arrangement's span and gaps, moving intervening clips as needed.
Use Group to process several clips together. Their own operations run first, followed by the group's chain. Edit children opens the group's arrangement; the Build breadcrumb returns to its parent. Build and Render share zoom and scrolling. Fit shows all Build material and the fixed output range.
Arranging beyond the output boundary does not extend it. Change Project → Fixed output length to include that material.
Set how a clip plays in Render
Build prepares the audio unit. Selection → Render sets how that unit plays, with its own span, Rate, Volume, and Crossfade. Crossfade softens transitions. The Render span can be longer or shorter than the Build slot.
- Once plays Build once, then feeds silence through the operations for the rest of the span.
- Loop repeats the complete Build unit, including any space.
- Ping-pong alternates forward and backward through that unit.
For example, at Rate 1, a one-beat Build clip with a two-beat Render span can play once and stop, repeat twice, or play forward then backward. Drag the Render clip's right edge to change its span. Follow Build duration clears the override. Trimming its left edge also trims the shared Build clip.
Edits render automatically. Clicking Render immediately makes a new saved operation roll as one undoable edit. Build footers show the configured chain; Render footers show the operations that contributed to the displayed audio. Render colours follow the sources you hear, including Tunnel replacements.
Add and order operations
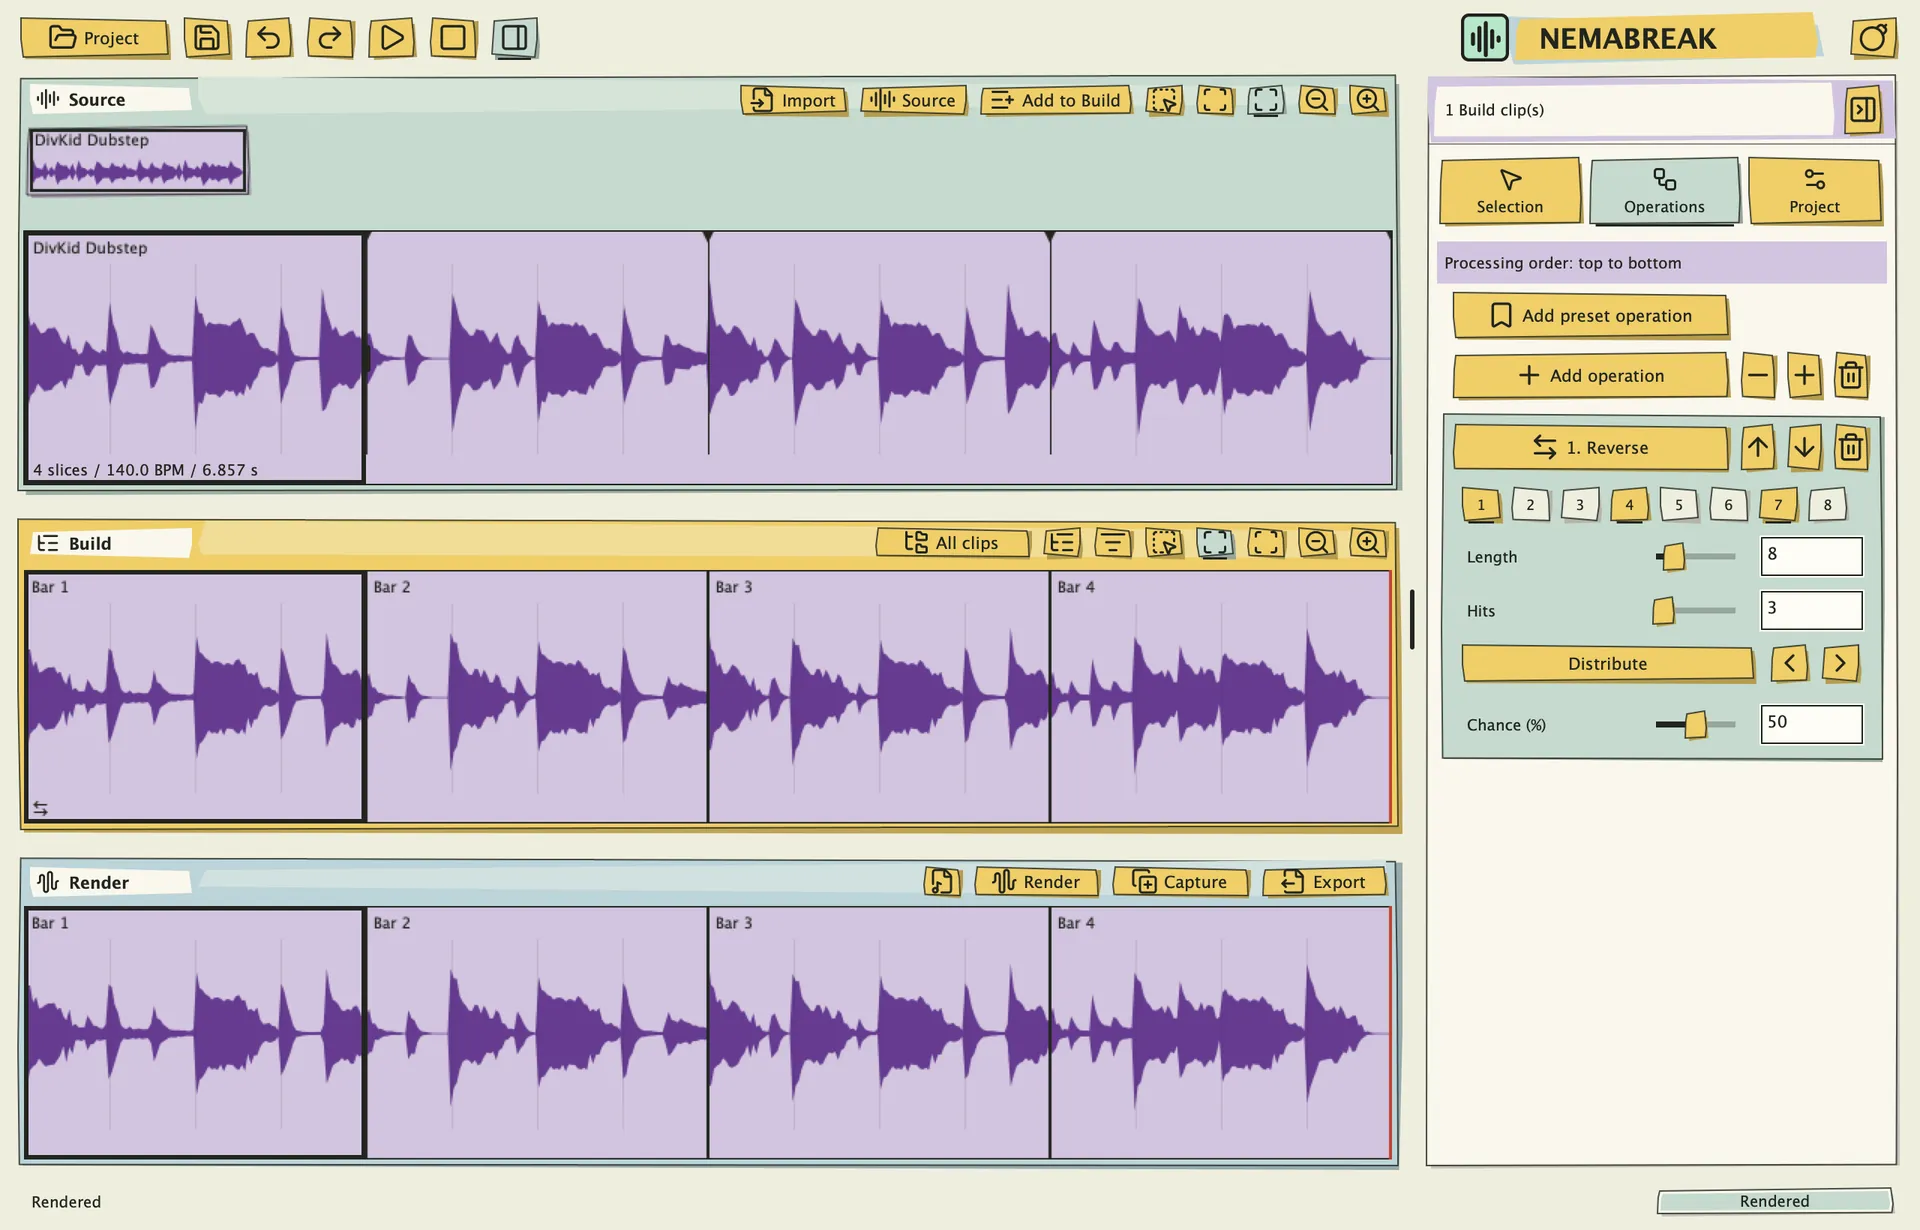
Select a Build clip, open Operations, and use Add operation. Cards process audio from top to bottom. Drag a card's title or use its arrows to reorder it; click the title to collapse it. All ten operations can appear more than once, with separate settings and chances.
Order changes the sound. Reverb followed by Reverse reverses the tail too. Reverse followed by Reverb adds a tail to the reversed audio. Two Stretch cards make two passes. A clip showing Saved processing: drag to reorder keeps its original processing behavior until you add or reorder a card.
Where a parameter has Start and End, equal values hold it steady; different values change it across the Render span. Drag the point in the curve graph to make the change happen earlier or later.
Pitch, Reverse, and Reverb
Pitch transposes in semitones. Use equal endpoints for a fixed shift, or different endpoints for a sweep. Reverse first in the chain reads Build backward before Render playback, so Ping-pong starts backward. Later in the chain it reverses the preceding audio's complete Render span, including tails.
Reverb has an Amount percentage and stays inside the Render span. Extend both the clip's Render span and the project's output length when you need space for a tail.
Jump and Stretch
Jump shifts the read position by a random nonzero multiple of Resolution, forward or backward, within Span. With Span at 1 beat and Resolution at 0.25, possible offsets are ±0.25, ±0.5, ±0.75, or ±1 beat. Span zero, or Resolution larger than Span, gives no move.
Stretch slows the read position through overlapping grains, from 1× to 100×, for sustained or smeared textures. It works within the existing Render span. Build's Stretch to fit controls how material fills a slot separately.
Filter
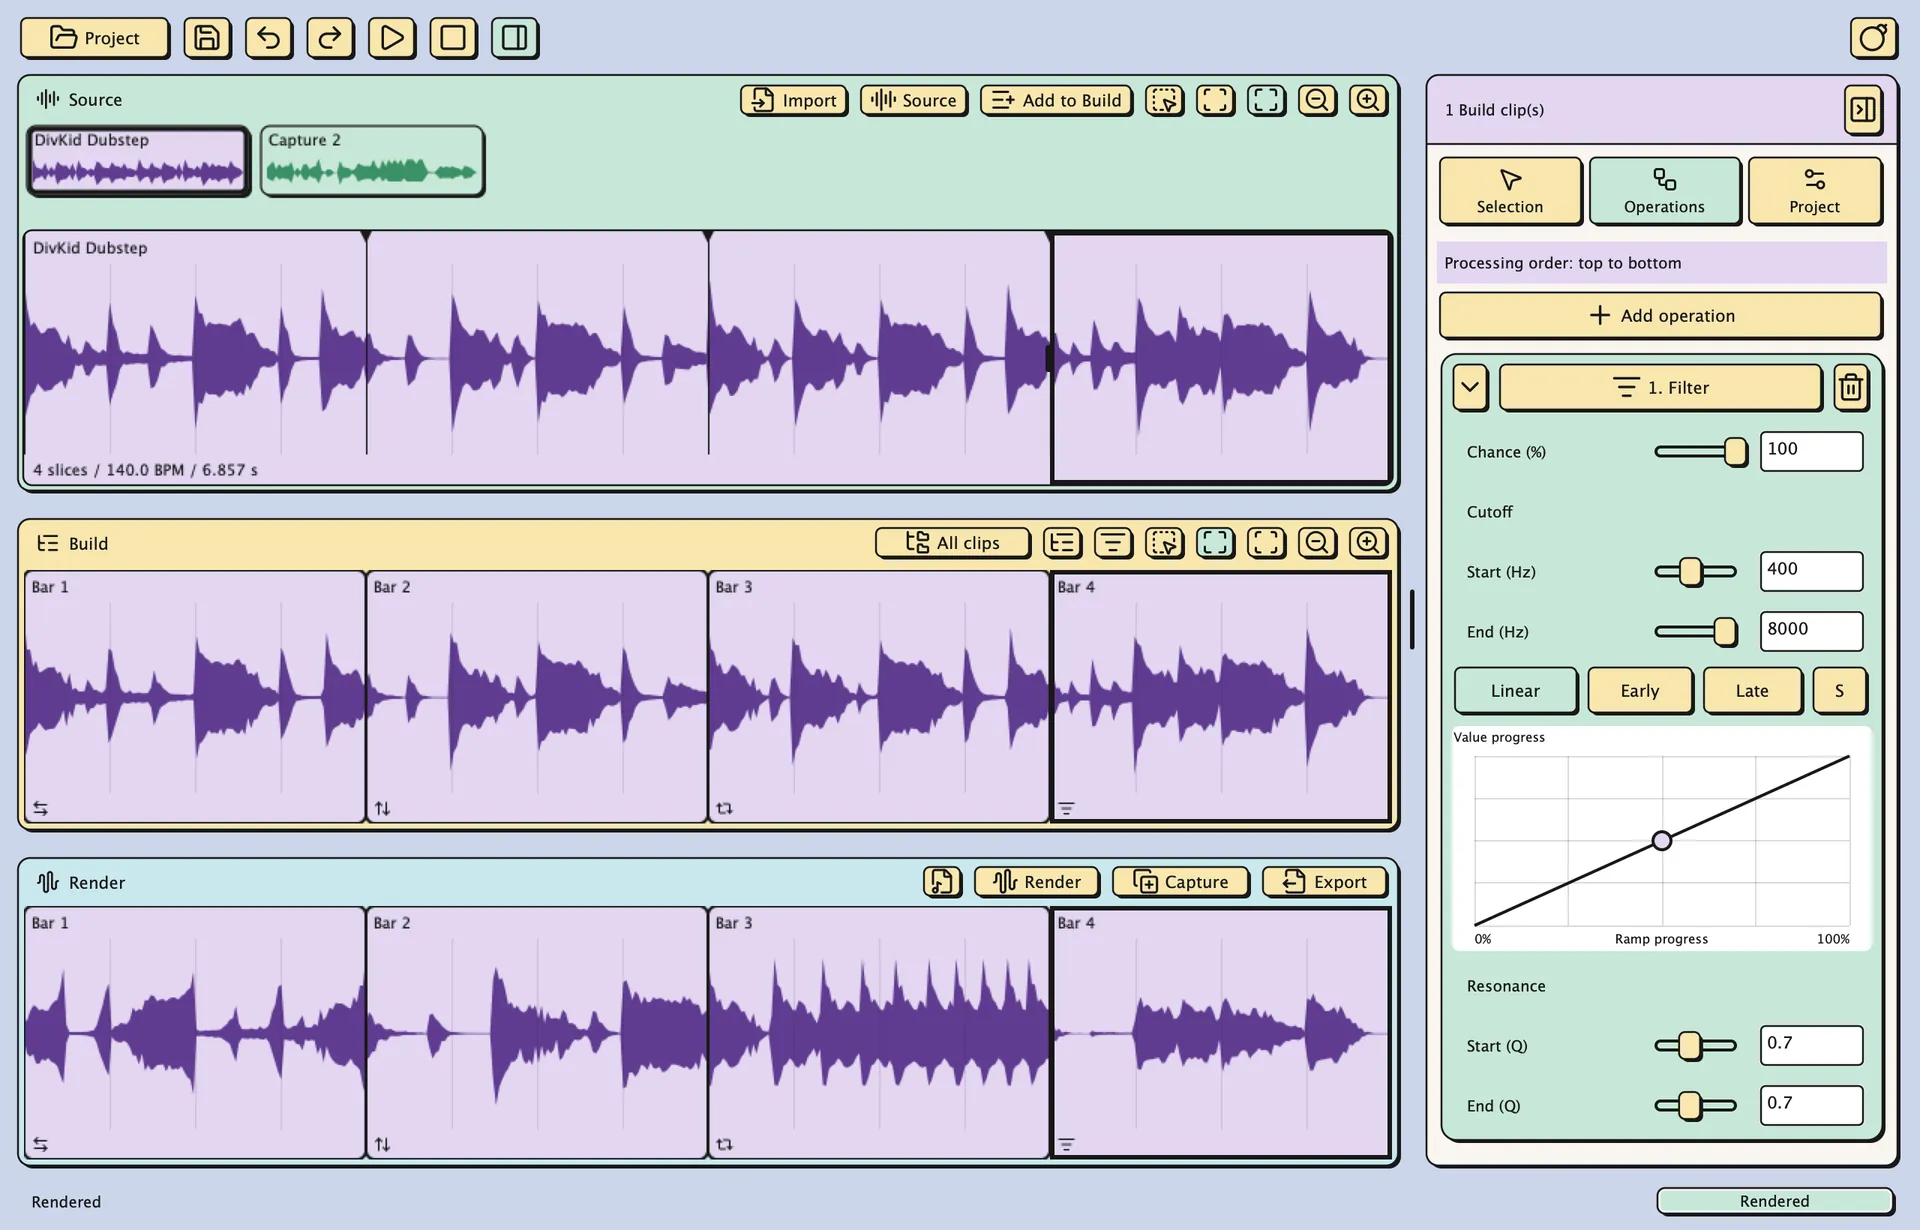
Filter is a resonant low-pass filter: lower Cutoff removes more high frequencies, while Resonance emphasizes the cutoff region. Each has Start, End, and a curve. Try a Cutoff sweep from 400 to 8000 Hz to hear a clip open up.
Retrigger
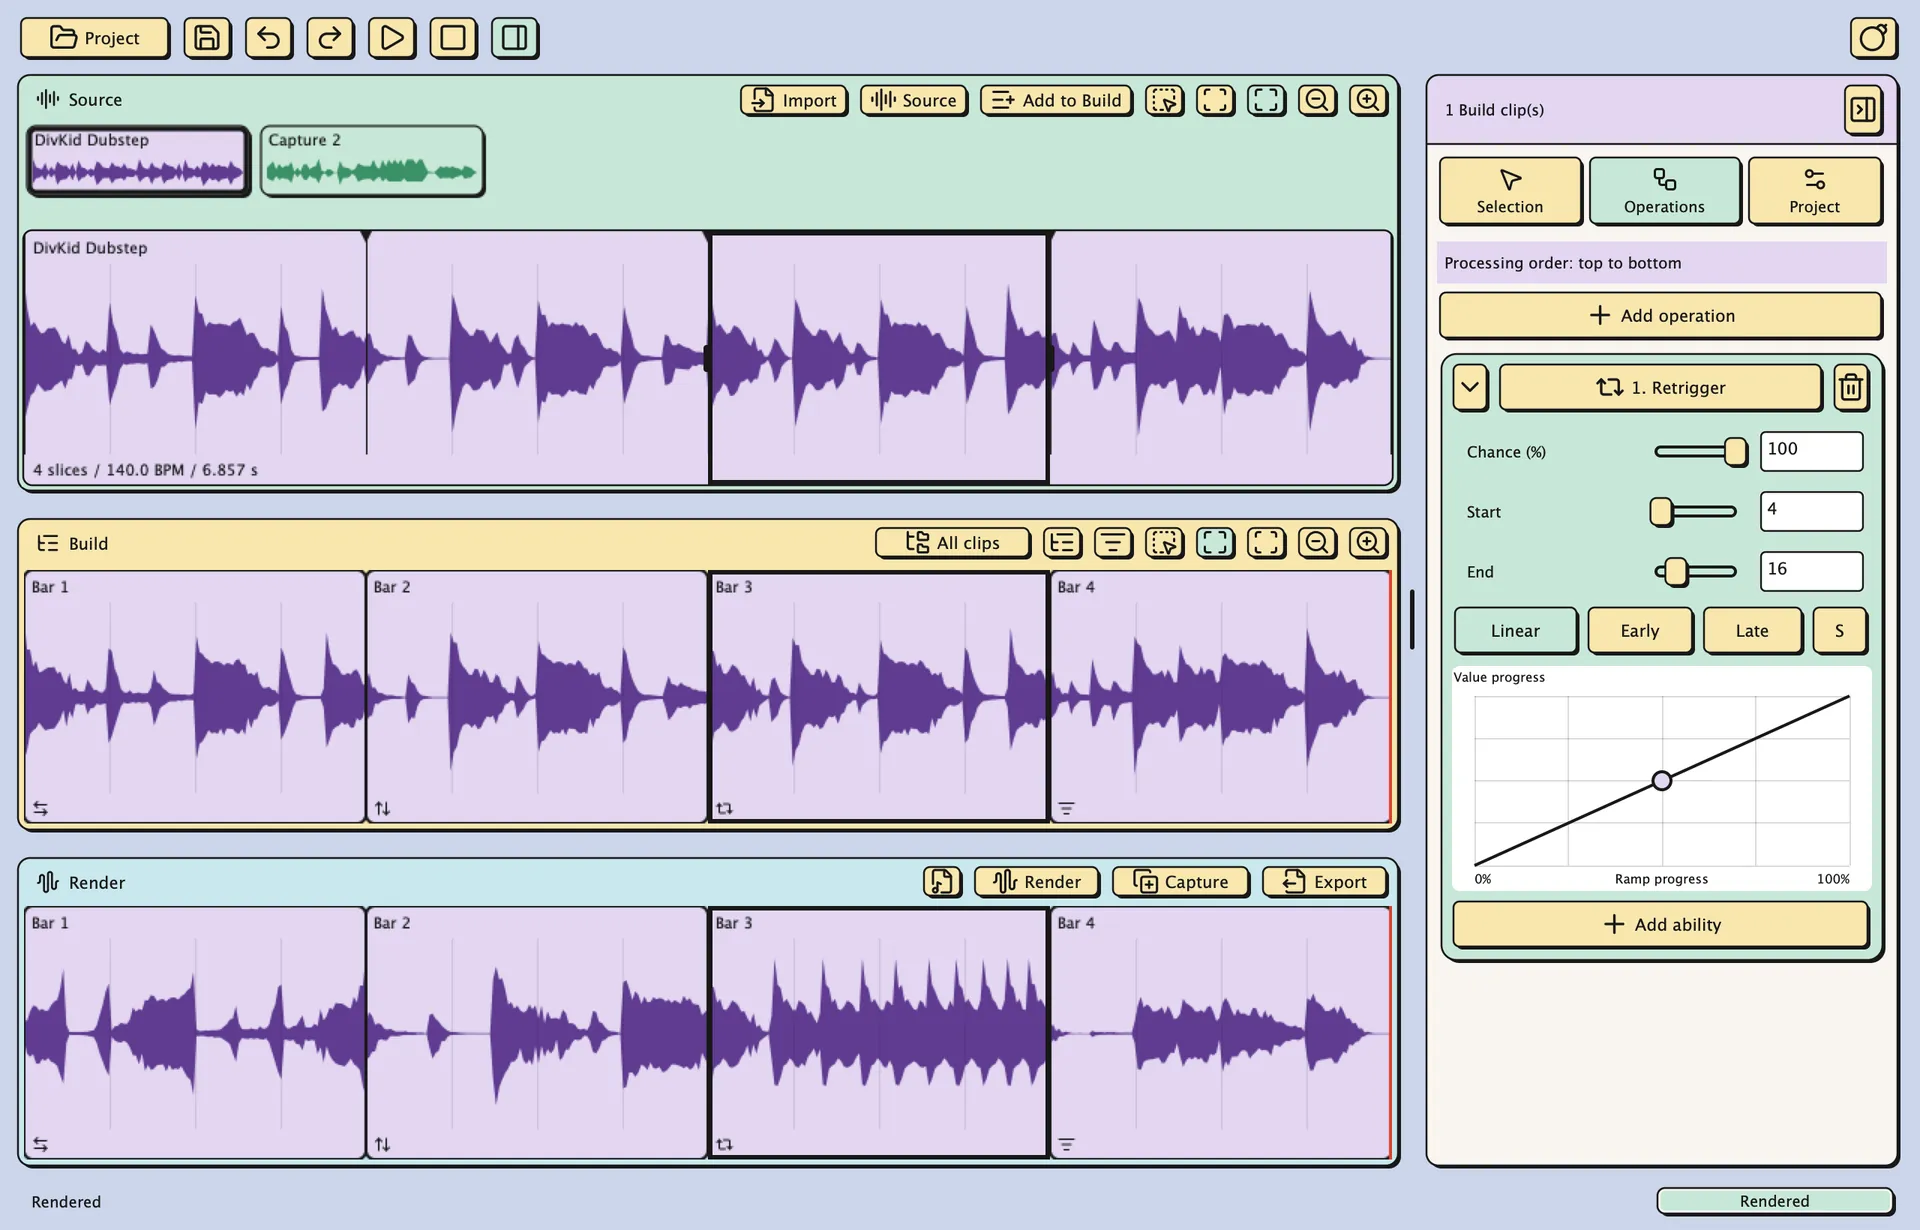
Retrigger repeats fragments. Count starts at 4 → 4. A 4 → 16 ramp moves from the spacing of four hits per span toward sixteen; the actual hit count depends on the ramp and curve.
Add ability adds Spacing, Pitch, Volume, or Filter inside the card. Spacing multiplies the count-based interval, so smaller values bring repeats closer. Details → Use interval timing replaces Count with Spacing measured in beats. Each ability has a conditional Chance rolled after the card's overall Chance: 50% for each gives that ability a 25% chance.
Tunnel
Tunnel replaces the audio with another source. Drag shelf cards or the Source waveform into Drop sources here, or click Add all. Enable the targets you want. Each roll chooses equally among enabled alternatives, excluding the currently active source. With no alternative it leaves the audio alone.
The starting percentage carries across: a position 77% into one source starts 77% into the target. The target's tempo determines how much audio is read for the selected duration in source beats. Tunnel replaces earlier processing; later cards process the replacement. Jump → Tunnel carries a jumped position across, while Tunnel → Jump shifts within the replacement. In a group, a chain containing Tunnel runs separately for each source clip after that clip's own operations.
Cloud and Reset
Cloud turns the incoming audio into overlapping grains. Dissolve 0 → 100% moves from intact audio to a cloud; 100 → 0% returns to the incoming audio at its timeline position. Grain size sets fragment duration, Scatter span sets random read distance in beats, and Density controls overlap. Colour contains Pitch spread and stereo Width. Cloud processes earlier cards without extending the output.
Reset discards earlier operations and source replacements, restoring the clip's Build audio with its Render playback settings. Later cards still apply. On a group, Reset restores the assembled input with the children's processing intact.
Save a chain as a preset
With one ordinary Build source clip selected, use Add preset operation to browse factory and user presets. Apply preset appends cards to the chain. Save clip operations as preset saves settings, curves, chances, and patterns in a .mrpreset file. Tunnel pools start empty when applied.
When several clips are selected, cards match by occurrence: first Pitch, second Pitch, and so on. Editing a mixed field changes that field on clips containing the matching card. Adding an operation adds a new card to every selected clip.
Choose when operations happen
Open a card's Chance & Pattern controls; Reverse and Reset show them directly. Checked steps permit a Chance roll, and unchecked steps bypass the card. At 100% Chance every checked step passes. At 0% none do. New cards begin with eight checked steps.
Set Length from 1 to 32 steps. Click boxes yourself, or choose Hits and press Distribute for evenly spaced hits. The arrows rotate the pattern. One checked step in four with 50% Chance permits a roll once every four passes, succeeding half the time on average.
A pass through the whole output, or a selected playback range, advances one step. Repeats inside a clip do not advance the pattern. Playback starts, DAW transport restarts, MIDI triggers, and new renders after edits begin at step one.
Loop rendered playback and Reroll operations each loop both start On in Project. Rerolling redraws chances and advances patterns for each prepared pass. Turn it Off to repeat the current audio and pattern step. If the next pass is late, the current one repeats until it is ready.
Capture or export the result
Capture adds the rendered mix to the source shelf as independent audio. Slice it, arrange it, and process it again. Export WAV saves a file; Drag audio drops the result onto a DAW audio track.
Drag across Render's top name strip to select a range for playback, capture, export, or dragging. Without a range, these use the whole fixed output. Click empty space to clear the range.
Capture, export, and audio dragging use the saved render. Live loop variations are temporary. Click Render to generate a new saved roll, then audition it before exporting. These actions need a current, successful render and all inputs used in the output assigned. Drag audio also waits for its WAV to be ready. If your DAW rejects a drag, export the WAV and import it there.
Video on macOS
Drop an MP4 or MOV with audio and picture onto the window to work with its audio. The Render export menu then offers Export Video, producing a 1280 × 720, 60 fps MOV whose picture follows the source positions in the saved render. This needs FFmpeg and ffprobe installed locally. Keep the original video, and use Relink Video in Source properties if it moves. Captures contain audio only.
Set levels and save a project
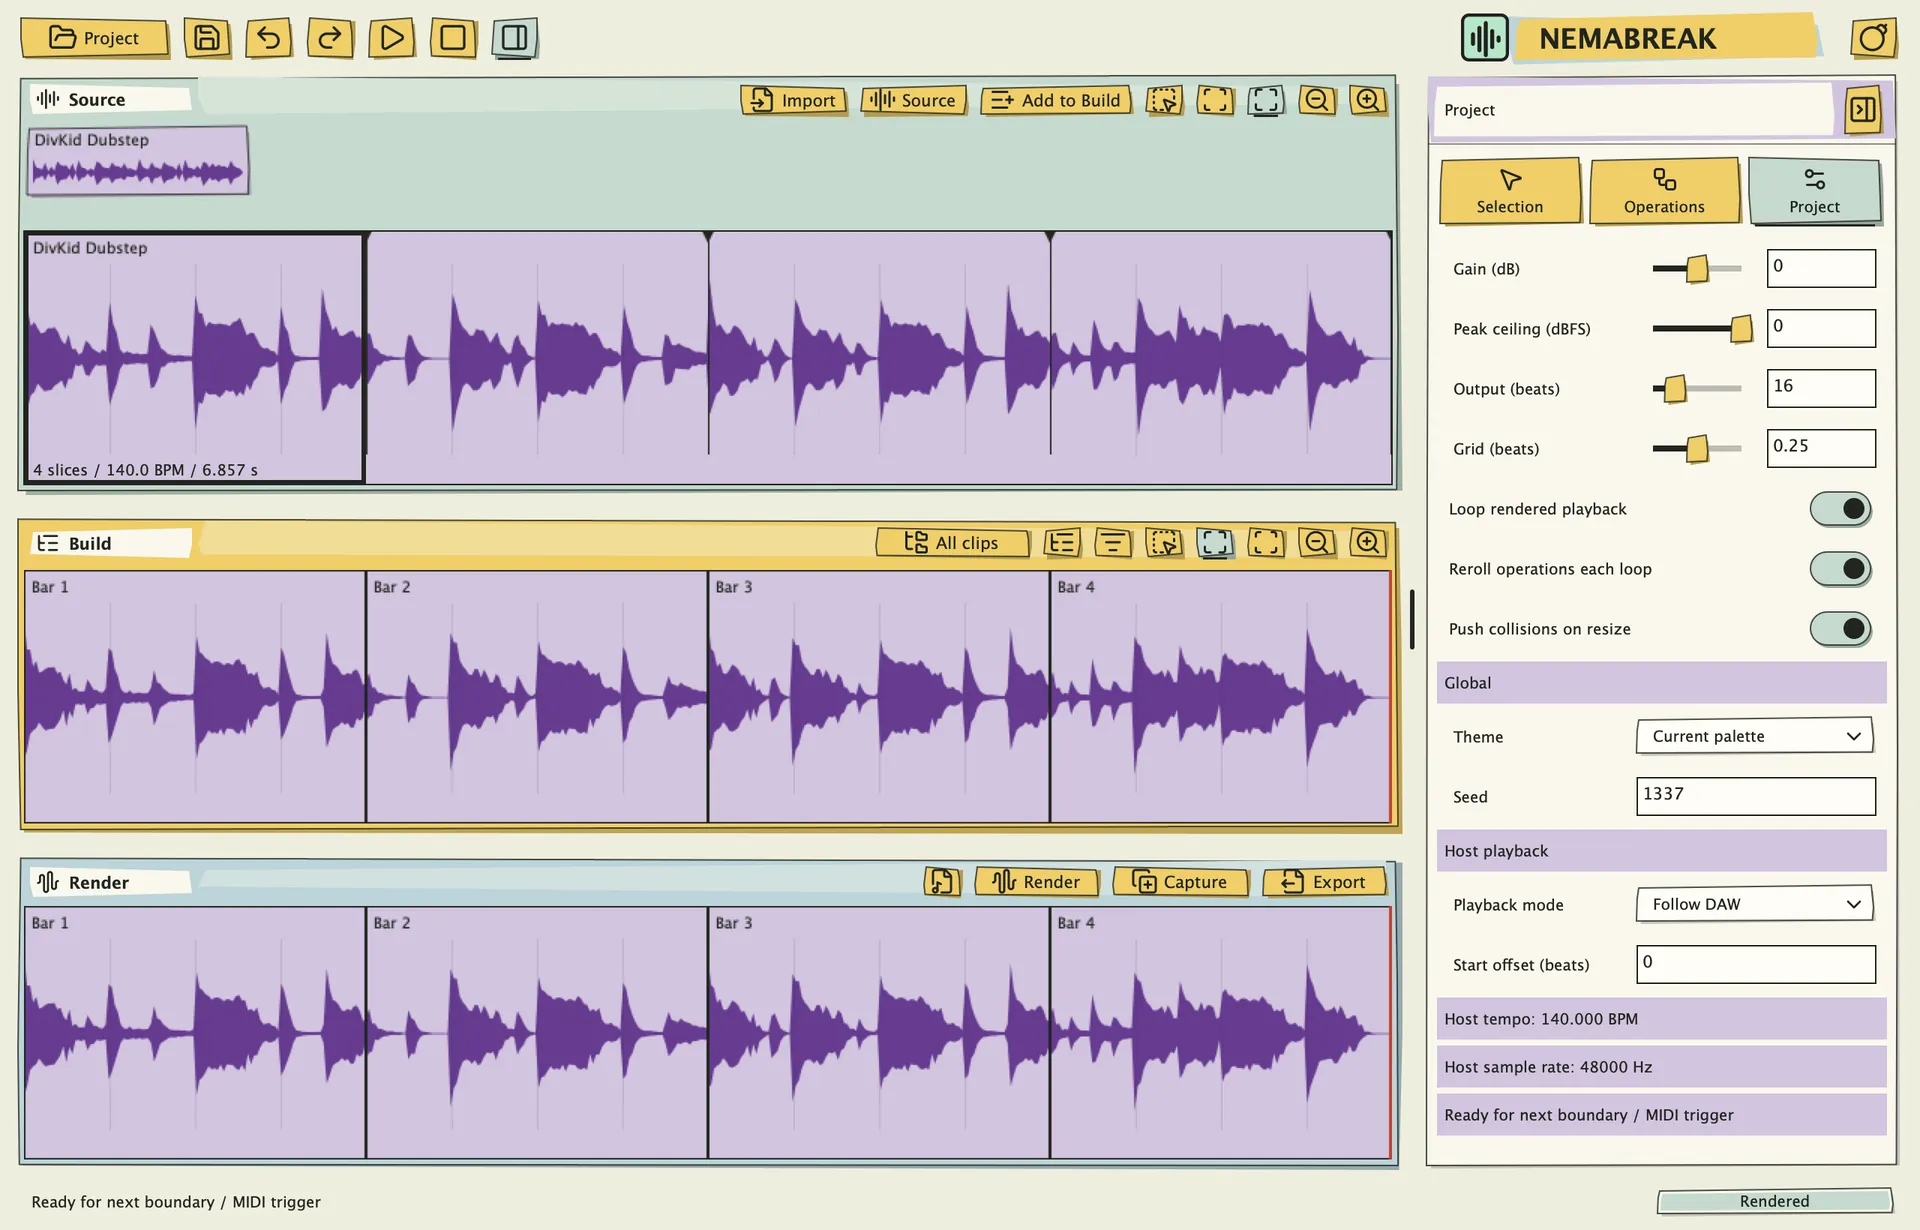
Project holds tempo, fixed output length, grid, and playback settings. Push collisions on resize moves following clips out of the way during resizing. The standalone also sets the render sample rate and audio output device here. If changing devices stops playback, press Play again.
Gain adjusts the final mix from −24 to +24 dB. The bomb icon toggles Boost, which starts Off and applies DeClick, A Bit Warmer, then Sub Kick Maker at 5% wet. Peak ceiling follows Boost, defaults to 0 dBFS, and can be lowered to −60 dBFS. It reduces peaks above the target while leaving quieter audio unchanged. These settings affect playback, capture, export, and bounce; Source previews keep their original level.
Project seed reproduces the saved operation roll. Automatic renders after edits reuse it. Clicking Render advances it, and Undo restores the previous roll.
Use the Project menu's Save or Save as to keep source audio, slices, arrangement, operations, and captures in a .nemabreak file. The original audio files are then no longer needed. Video export still needs linked videos. Current-format .mrsampler files also open.
The standalone resumes the previous workspace with playback stopped. Edits autosave after a short pause. Recover last autosave restores that snapshot; use Save as to keep the recovery as a named project. Theme and inspector appearance are remembered separately from projects.
Use NEMABREAK in a DAW
Load NEMABREAK as an instrument on a MIDI track. Choose AU or VST3 as supported by your host and installed package. Tempo and sample rate follow the host. In Project → Host playback, choose how the pattern starts.
Follow DAW follows the song's beat position, including seeks and loop wraps. Start offset sets the pattern's starting position in beats; zero is song start, and playback is silent before the offset. Turn Loop rendered playback Off for a single pass.
MIDI trigger starts the whole pattern on any note without changing its pitch or volume. The latest note wins, and releasing it stops playback. Held notes loop when looping is On. Preview auditions through the host outputs and can use a selected range. Follow DAW and MIDI trigger use the whole output.
Completed edits take over at a loop boundary or the next MIDI trigger. Tempo changes need a matching render. A fixed-tempo offline bounce uses the saved roll. Saving the DAW session includes the arrangement and source audio; Load project and Export project exchange projects with the standalone.
Register the app and instrument
Enter your purchased code at startup or in Project → Registration. One registration covers the app and instrument for your OS user. Initial verification needs internet access; verified registration works offline. Retrieve a purchased code from your Infinite Digits account.
Registration removes the trial's three-source limit and reminders. Larger saved projects open fully while unregistered, but adding more sources is blocked. To free a slot, right-click an unused shelf card and choose Remove source. A source referenced by clips or Tunnel pools must stay until those references are removed.
Keyboard shortcuts
Use Command on macOS or Ctrl on Windows/Linux. Text fields accept Enter to commit and Escape to cancel. Hover over an icon for its action name.
- Space plays or pauses. Escape cancels a gesture and stops playback.
- Command/Ctrl-S saves; add Shift for Save as. Command/Ctrl-O opens a project; Command/Ctrl-I imports audio.
- Command/Ctrl-Z undoes; add Shift to redo.
- Command/Ctrl-C / V / A copies, pastes, or selects all. Delete / Backspace removes selected Build clips.
- Command/Ctrl-G groups; add Shift to ungroup. Command/Ctrl-E splits at the grid midpoint.
- Command/Ctrl-0 / + / − fits or zooms the timeline. Command/Ctrl-wheel zooms the row under the pointer.
- Command/Ctrl-\ toggles the inspector.
In the instrument, Space and Command/Ctrl-S are left to the DAW. Use Preview to audition and save the session from your host.
If something is not working
- Missing or silent audio: check the clip's Input assignment, its Volume, and the fixed output boundary. In the standalone, check the audio output device. In a DAW, check the instrument track's routing and Host playback mode.
- A tail gets cut off: extend the clip's Render span and the project's fixed output length.
- The pattern repeats unchanged: check Reroll operations each loop. For an individual operation, check its Chance and checked pattern steps. Tunnel also needs an enabled alternative source.
- The export differs from a live pass: export uses the saved render. Click Render to make a new saved roll, then capture or export it.
- Capture or import is blocked: the trial shelf limit includes captures. Remove an unused source or register.
- Audio dragging fails: wait for the current render and WAV preparation, or use Export WAV and import the file into your DAW.
The NEMABREAK manual has further reference screenshots. Use Send feedback on the NEMABREAK website to report a problem, including your version, operating system, DAW if applicable, and the steps that reproduce it.